A Smashing Success

s3

I’m going to make a hole in a window

You’re going to break a window?

Not break a window. Just put a hole in one.

So smash it, you mean.

Yes, it might look smashed.

What will you smash it with?

Does it matter what smashed it?

If you want to smash a hole in a window, you have to hit it with something.

What would you use, if you were to smash a window?

Me? I’d use a baseball. Maybe smack it hard with a bat. You could hit it from clear across a field and no one would know it was you.

People will know I smashed this window.

See, that’s why you use a baseball or something. Make it look like an accident.

So, an unfortunate baseball incident?

Exactly.


s1

“The Unfortunate Baseball Incident”


S  S is for Smashing.

Clusters: All Together, Now

cluster example 5
In yesterday’s post, the definition of bevels included the mention of “geometric configurations (called ‘clusters’) for incorporation into leaded glass work.”

Ah, clusters…

The fun thing about clusters is that you have ready-made pieces that you simply fit together (with copper foil or some type of came, i.e. lead), and then fill in the rest of your pattern with pieces to accomplish the desired panel shape (rectangle, square, circle…).

For example, I purchased a bevel cluster with ten bevels that – when pieced together – would look like this ornate design:

cluster example 1

By cutting glass in the shapes of “1” through “8,” as pictured below, one could turn the design into a rectangular panel with the bevel cluster pieces (“a” through “j” in the diagram) centered within the rectangle. A simple example:

cluster example 2

Something I like to do for fun is use the bevel pieces in a more unconventional way and incorporate them into panels to create entirely different patterns. In the example below I kind of “exploded” the bevel cluster and came up with this design:

cluster example 3

And here is the completed panel:

cluster example 4

I need to work on my window photography.

I titled the panel “Ascending.”

The bevels used in the “Manifest” design that appears on the header of this blog is another example of using a cluster in an unconventional way. Can you guess what the design was originally intended to be?


C  C is for Cluster.

Dog Imitates Art

The theme for this week’s Daily Post photo challenge is “Life Imitates Art.”

When I created the “Canid” panel (pictured below), I had a fox in mind. Some folks commented that it looked like my American Eskimo dog, except for the coloring of course.

I’ve been thinking about tweaking the design to make a similar panel to represent my Eskie. Might have to add that to the queue of projects.

In the meantime, enjoy my entry for the “life imitates art” challenge:

art1

Chules, my America Eskimo dog

art2

“Canid” stained glass panel by Maggie C.

Give Me a Break

break2

When working with stained glass, it’s always wise to factor in the likelihood of breakage during the construction of a panel. That’s what glass does. It breaks. It cracks. It shatters.

And when it does, you say, “Oops!” or some other four letter words, sweep away the shards, pull out the extra glass that you purchased for just such an occasion, and go on with the project.

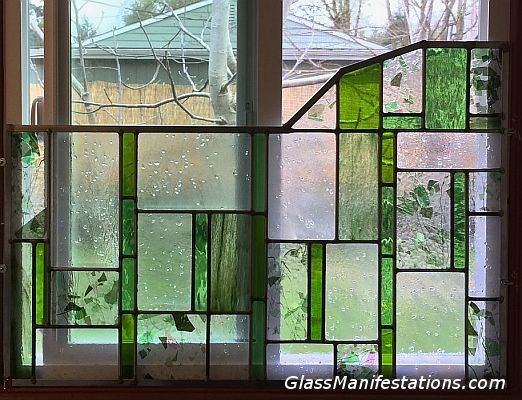
But sometimes you have only a limited supply of a particular type of glass, and you have to plan carefully to get the best use out of it. And so it was with my Spring Birds panel.

break4

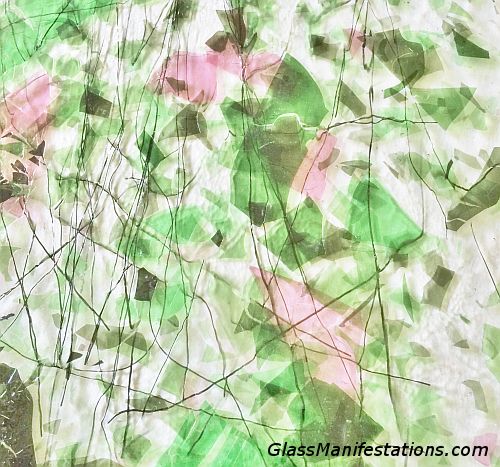
The background glass was rather spendy, and so I bought just the amount that I thought would be needed for the project.

When it came to cutting and fitting the largest background piece into the panel, I was ever so careful to get it just right. There would be no second chances, because I had no other piece of that kind large enough to replace this one.

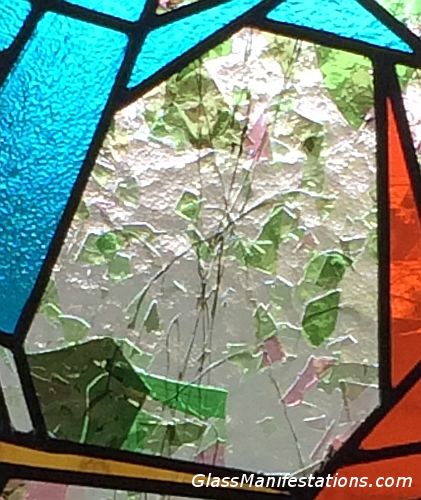
I got the piece in, sighing with relief as I tapped the horseshoe nail into place to keep it from shifting and, as I turned away to get the next piece to put in place, I mindlessly gave the nail just one. more. tap.

And I heard it. That heartbreaking, glass breaking, shard making sound. I looked back and saw this:

break1

Oops, indeed!

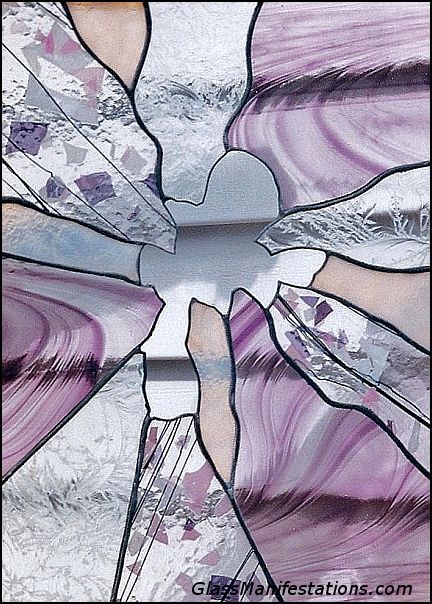
Long story short, after a trip to the Uroboros glass factory and many dollars later, I was able to replace the broken piece and finish the panel.

I guess when you work with glass, them’s the breaks.

break


Daily Post weekly photo challenge: Oops!

Seasonal Transitions

It’s fun to make series of panels on a theme. I have one in progress that I’ll share more about later.

The topic of The Daily Post’s weekly photo challenge this week is Transition.

Here I have used some fun background glass to help depict the four seasons. Hope you enjoy.

Click on photo below for larger images of each panel.

seasons

Inside a Kaleidoscope

I was speaking with “T” the other day about the importance of making our surroundings pleasing to our senses. T is familiar with my stained glass work and she commented on how wonderful it would be if I hung my glass art in every window of my house.

“It would be like living inside a kaleidoscope!” she told me.

What a vivid image! A home where every room dances with color and light! I might not go for it if I lived in a setting where Nature’s own designs graced my view from each window.

But as I sit in my living room gazing out my picture window at the Walgreens Pharmacy across the street, I’m thinking this just might be the perfect spot for a kaleidoscope. Or at least a stained glass panel.

kaleidoscope

In response to Cee’s Fun Foto Challenge: Sight. “This week’s topic is the colors of the sense of seeing…  [P]ost anything that stimulates or delights you visually.”

Symmetry in Design

symmetry

Weekly Photo Challenge Symmetry

To some extent, I try to avoid exact symmetry in my stained glass panel designs. The biggest reason is that I’m not very good at being exact about anything.  So chances are that – even if I try – the left side will not mirror the right.

Weekly Photo Challenge Symmetry


So instead, I have fun coming up with designs that I like to call “Symmetrical… But Not Really.” Like the koi in these photos. A fish eye on the left, a fish eye on the right. A fin on the left, a fin on the right. The orange koi even goes so far as to sport matching wing tips – er, fin tips.

koi chap

The other chap, while having the symmetry of matching anatomical bits and pieces, shook things up a bit when it came to body art. A splotch of orange here, two splotches there… maybe not as soothing and peaceful to look at as his pond mate, but interesting and worthy of contemplation in his own right. *

An example of my SBNR technique can be seen in the geometric design of the panel below. The nine white-looking pieces (they are actually clear glass; photography’s not my strong suit) are from a pre-cut bevel cluster, meant to be assembled into a symmetrical pattern. But they are incorporated into a larger design that – while still pulling everything together in a balanced scheme – is not a match of left and right. To me, it gives the panel more vibrancy and greater interest.

And, of course, it helps avoid that whole exactness deficiency of mine.

I figure if it’s good enough for Mother Nature and her koi chaps, then it’s good enough for me.z8


* The assumption of male gender of the koi is based strictly on my desire to use the term “chap.” I do not have the wherewithal to determine fish gender based on an aerial view. Nor am I particularly interested in acquiring that skill set. Sorry, I have to draw the line somewhere.

 Weekly Photo Challenge:  Symmetry