Weekend Wildcard: deck update

I was looking back on previous posts on this site, and came across the horrendous photos I’d shared a few years ago of my rotting deck. Well, the photos weren’t really horrendous, I guess; the deck was.

I had written about how I could drive a pitchfork through the deck boards, how I wanted to coax another season out of the rotting boards by removing the most dangerous ones, and repainting the remainder with the decade-old sealer that I had stored from the last time I had done any work on the deck. And then the sealer had mostly washed away in an unexpected rain squall that came through just minutes after completing the paint job.

Well, I’m happy to report that this past summer, I actually replaced the deck!

Ripping up the old deck was every bit as fulfilling as I had expected. Demolition is fun when it’s intentional! The deck boards had been nailed to humongous creosote-soaked beams 12 feet long and with a diameter of 36 inches.  Seven of them. Six and a half, actually, since I had already removed half of one beam that had rotted clear through.

The hardest part was moving those beams out of the way, which I managed a few tedious inches at a time with a shovel and some boards to slide them on. Then I set about constructing my new deck.

The new deck is half the size of the old one. I built it using a plan I found online. It’s nothing fancy, just a 12’ x 12’ square. This spring or summer I will seal it (with new sealer, not something that’s been sitting around for years – gotta protect my investment).  

I can’t wait to spend time on my new deck once the weather moderates. And I can’t describe how immensely satisfying it is to look out my window and see my own handiwork rather than the dilapidated structure it replaces. Simple pleasures, I guess.

I’m still working out what to do with the old beams. I might use them to replace other creosote-laden railroad ties that were used around the property as retaining walls. My next big project, perhaps. A few inches at a time.

What Rhymes with NaPoWriMo?

For the past two Aprils I have participated in the A-to-Z writing challenge, where one writes 26 posts for the month, following an alphabetical theme of some sort. I had a wonderful idea for this year’s challenge but, alas, it didn’t get past the wonderful idea phase. Maybe next year.

But this year – well, just today – I decided to participate in NaPoWriMo, the National Poetry Writing Month. The challenge is similar. Write a new poem each day for a month. I may not post all of these poems, but I will share at least some of them.

floor1

Chules likes the “industrial” style of my new kitchen floor. He can scratch it up to his heart’s content, and it will just add to the “look.” 

I’ve been neglecting the blog lately as I’ve been focusing on my seemingly never-ending kitchen redo project. This week, I finally installed the new flooring. I’m very proud that I managed to reduce my sitting-on-the-floor to standing transition time by several seconds. And I think the floor turned out well, too.

So now I’ve got ‘til Sunday to locate my poetry muse, dust her off, and convince her to join me in this endeavor. I wonder where she wandered off to…

Weekend Wildcard: All Decked Out

I knew my deck project was a lost cause when I started. Having determined that there was more rotten wood than good, I should have followed everyone’s advice and torn the thing down.

But I was determined that I could at least make the deck safe enough to eke out one more year of use before demolishing it, and so I set out – with no particular plan – to fix it.
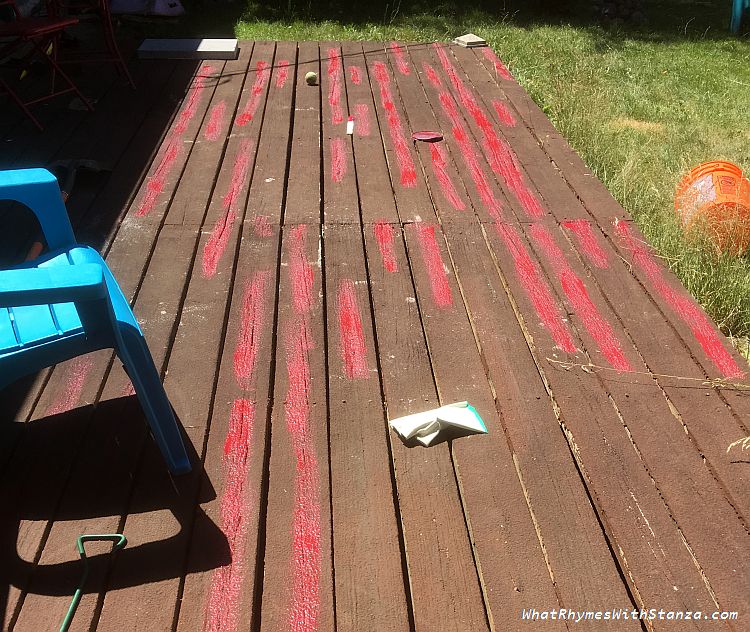
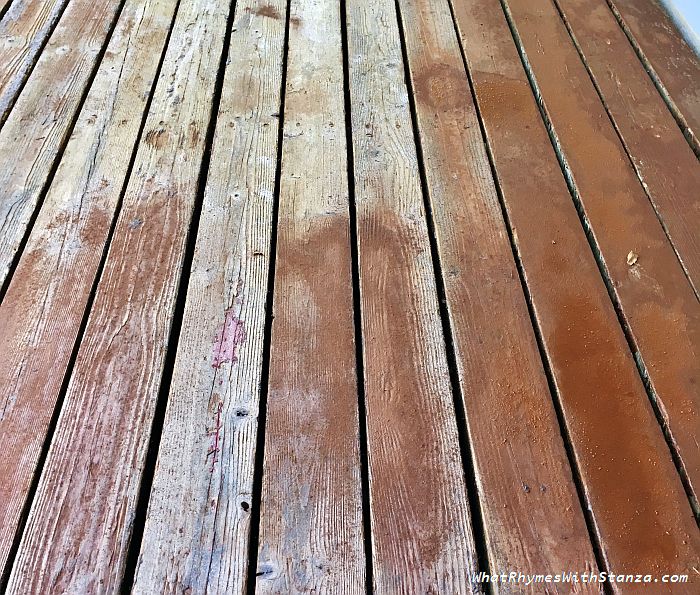
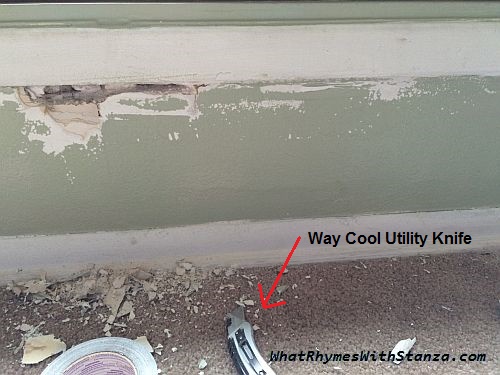
deck 2

Red marks the rot.

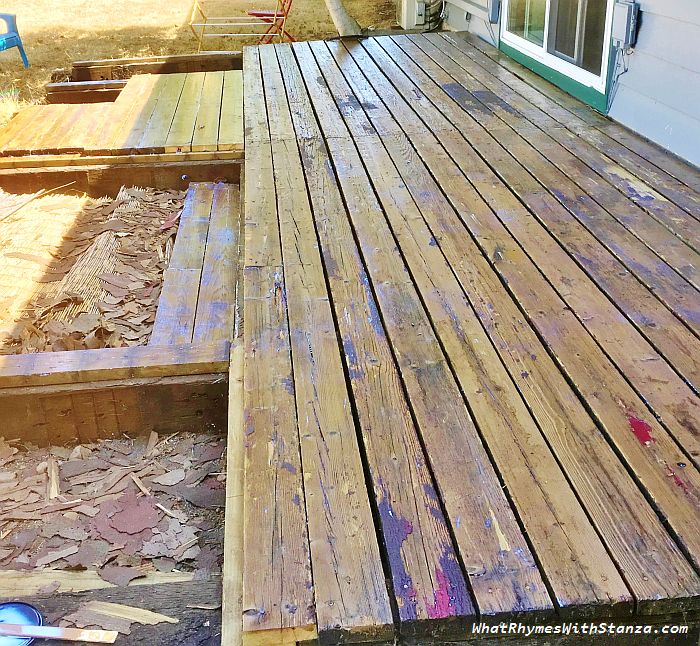
I ripped up the most rotten planks and filled in with lesser rotten planks. I cut the worst parts off of some half-rotten planks and nailed the better portions across the one- or two-beam spans they would still fit. I flipped some planks over so the cupping would turn to crowning (although I’m not sure what advantage I saw in doing that). The result was as hodgepodge as the process makes it sound.

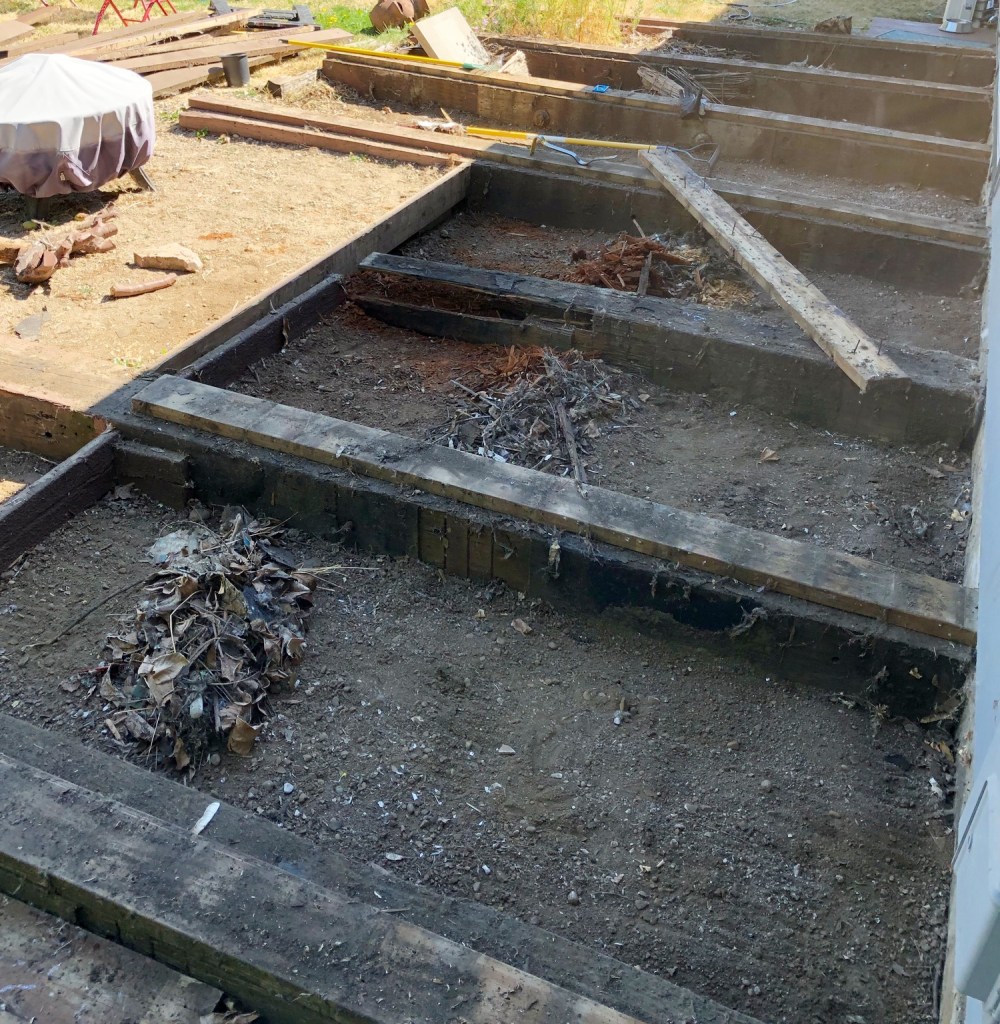
I still saw potential. Build some steps here, fill in some holes there… maybe even use the beams that stuck out farther than my now reduced-size deck to frame planter boxes. By the time I was done, those House Beautiful photo spreads would pale in comparison to my deck.

Nothing up to this point required any monetary output. I aimed to continue that trend by repainting the deck with the same stuff I had used previously. The exact same stuff. The stuff I had purchased about 10 years ago. The stuff that had been sitting out in a shed, exposed to a decade of hot summers and freezing winters. It should still be good, right?

I pried open one of the five-gallon buckets of leftover paint. It was about half full and had separated into sludge at the bottom and murky liquid on top. After some effortful stirring, it looked usable. Maybe. There was another partial bucket of paint plus a full bucket, so I was good to go!

First, though, I scraped off the old paint that was peeling rather dramatically in some places. That took a long time, but I used it as a kind of meditative practice. Sitting on the warm deck, my 3” metal-bladed scraper in hand, I let my mind wander as I puttered along from plank to plank. The hardest part was avoiding splinters in my bottom.

I splurged for a gallon of deck primer because, after all, the previous paint job had only lasted eight years or so. The primer had to go on when the deck was dry. No problem. It hadn’t rained in two months, and in checking the forecast, there was only a 15% chance of rain. I checked a second weather app just to make certain. Then I primed the deck.

deck8

The primer made the deck look all shiny and smoothed some of the splinters down, so it was already a huge improvement. After three hours of drying (per the instructions), the deck was ready to paint. It was getting a bit cloudy, but a 15% chance of rain means it’s 85% not likely to rain, right? Besides, the report had shown the chance of rain decreasing as the afternoon wore on.

So on to the painting. The unopened five-gallon bucket of paint was unusable; the sludge at the bottom had actually solidified. The two partial buckets were workable, and after combining them, I had just enough paint to cover the deck. It looked really good when I finished. I mean, really good!

deck11

This is what the paint is supposed to look like. A thick, textured finish.

I cleaned up my painting tools in the garage utility sink, came inside and looked out the window at my beautiful deck. And it was raining. Yes, rain. Not just a trace. Real honest-to-goodness big drops like we hadn’t seen in months. And it kept raining.

Today my deck is splotched with what paint managed to stay on.  Where the paint went on thicker or had more protection from the rain, there is a gritty sludge that so far refuses to dry. It looks horrible. I mean, really horrible!

deck10

But! I’m still not giving up hope! When the remaining sludge dries enough that I can get out on the deck, I will reassess my options. I may have to invest in some paint that was manufactured in the current decade. I may have to admit that the end result will only be good for a year, if that.

At the end of most DIY projects around my home, I can stand back, look on with the satisfaction of knowing that I have made improvements, and most likely have gained a new skill or improved upon a skill already acquired. When this deck project is done… hmmm.

Well, there will be more room in the shed where the paint sat for years. That’s a plus. And I guess I could still turn the gaping holes between beams into creosote-laden flower beds. That just doesn’t bring on much of a sense of satisfaction, though.

Maybe the satisfaction will come when I rip the deck apart, plank by plank. The rain has stopped. This might be the perfect day for it. A little demolition work always lifts the spirits. And I wouldn’t have to buy more paint. A win all the way around, no?

Weekend Coffee Share (1/8/17)

170108a

#WeekendCoffeeShare is graciously hosted by Diana at ParttimeMonsterBlog.com.


If we were having coffee, I’d advise you to bring a sweater when you come over. The house was 59 degrees (F) when I woke up this morning. It has since warmed up to 59.5. This is despite my heat pump running nonstop.

I don’t really understand how heat pumps are supposed to work. Something about exchanging inside air and outside air, but with the outside air at 33 degrees, I’m not sure I want it being pumped into my house. Nor do I want 90 degree air coming into my 88 degree home in the summer.

The user’s manual for the unit says something about how the system doesn’t work that great when it’s really cold or really hot outside. Seems to me, those would be the times you would most need it. I must be missing something about how the heat pump works. Mostly – right now – what I’m missing is heat.

Okay, I’m done complaining about creature comforts. For now.

If we were having coffee, I would update you on my kitchen remodel. It has progressed from, “This will be a fun challenge,” to “Oh my God! What have I gotten myself into?!?”

I decided to replace the double doors on the utility closet at the end of my cabinets with a bi-fold door to allow for better visibility and access. I will likely redo the kitchen floor in the near future, so I figured I might as well remove the multiple layers of flooring where I’ll be installing a sill for the bi-fold. The build up from one floor being laid over its predecessors over the years has accumulated to about an inch in depth, so it’s been like an archeological dig getting to the original surface.

I removed the facing at the base of the closet and discovered a mass of what appears to be old wall insulation that has likely housed many a generation of rodents over the past half century.

Without much further investigation, I cleaned all of that out with my shopvac (I haven’t looked yet to see if I sucked up any mousies into the vacuum). Then I peeked under the closet to see what else I might find.

170108c

At the very back of the space, there are two little holes leading to the outer wall of the house. They are cute little holes. In fact they look kind of like the holes drawn in cartoons, where cute little whiskered animals live behind the walls.

Today, I’m going to seal off those cute little holes and remove the boards beneath the adjacent cabinets along that wall. I suspect that entire area has served as a superhighway for rodents over the decades.

Please, have another cup of coffee. I’m in no hurry to get to that particular task. Maybe I’ll position my cat at the entrance to the kitchen in case any current residents become displaced from their nests. The cat would love to make new friends. Unfortunately that’s about all he would do with them.

170108b

I wonder if mice like coffee. Excuse me while I set out an extra cup. Do you suppose they take cream? Or just drink it black?

What? You’re leaving now? Well, okay. Watch your step. We wouldn’t want you squishing any of my cat’s new pets.

I wish you a fantastic, warm and vermin-free week!

Weekend Coffee Share 7/2/16

160702

If we were having coffee, I’d warn you again about the obstacle course that is my living/dining area. My stuff seems to have a life of its own, ebbing and flowing; here a conflux of clutter, there a sedimentary slew of who-knows-what; a veritable river of rummage.

The “stuff” isn’t your run-of-the-mill clutter and kitsch. There are tools, paint cans, various wood restoration products… It’s kind of like “Home Improvement” meets “The Perfect Storm.” So instead of saying that my house is messy, I just say it’s “in progress.”

Someone told me the other day that I am very good at tearing things apart. There was no mention of my skill level for putting things back together.

If I drew two columns to depict my Do-It-Yourself projects and titled one “Construction,” and the other “Destruction,” the latter list would likely be much longer than the first. I’m going to try to turn that around this week.

If we were having coffee, I would postulate that my caffeine consumption will surely help me be super productive today. And on that note, I’d best get off my bottom, grab a hammer and get productively constructive.

Thanks for stopping by, and I hope you enjoy the week ahead.


Thanks to Diana at Part-time Monster Blog for hosting the #WeekendCoffeeShare.

Oops! The Case of the Runaway Hole in the Wall

So there I was, sitting in my living room staring once again at that little bulging hole in the wall underneath the window. It was about the size of a thumbnail, with a couple of cracks running about three inches out from it.
hole1

Its location under the window made me concerned that the window might be leaking water and causing the damage. But aside from my water concerns, that little hole just irritated the heck out of me every time I looked at it.

For some reason this year I got it into my head that I was going to be some kind of do-it-yourself super warrior. So even though I’d never done any type of wall repair before, I set out to fix that annoying anomaly.

First I took my handy dandy utility knife (I absolutely LOVE my utility knife; it’s just so… utile), and cut out some of the wall sheetrock to see what I was dealing with.
hole2

Then I accidentally cut into a prior mesh patch (oops!) and ended up removing it. So I had a bigger hole to fix.
hole3

This was more than I had bargained for. I paused to consider my options. While pausing, I made a temporary patch using a pizza box and duct tape (I absolutely LOVE duct tape. It’s just so… ducky).
hole4

At least I didn’t have to look at that little hole in the wall anymore.

As the saying goes, “In for a penny, in for a pound.” I forged ahead, replacing the pizza box with sheetrock, and taping and mudding and sanding the new repair. The offending little hole spot now looked like this:
hole5

A little texture spray and new paint, and the wall under the window looks as good as new, except for the missing baseboard that I tore off. But that’s a totally different do-it-myself super warrior story.
hole6


Daily Post weekly photo challenge:  Oops!

Trick? or Treat?

The Daily Post’s theme for this week is “Treat.” We are invited to share a photo of “something that you consider a marvelous treat.”
treat 1
For me, tackling do-it-yourself projects is a fun treat. Usually.

I live in a modest house built in 1955 in a housing tract. I can walk for blocks in most any direction and find row after row of houses that are some rendition of the same floor plan as mine. It’s interesting to see what others have done to personalize their homes. Shutters, brick facades, porches or decks, remodeling to convert the attached garage into more living space…

Maybe if you didn’t know it was a housing tract you wouldn’t recognize that you were looking at the same house over and over and over. But, nah… I think you would.

When I purchased my house, it had previously been used as a rental property. I continually find areas where slipshod repairs and fixes were made on the cheap. No “pride of ownership” is evident.

The good thing about that is that the less-than-pristine condition of the house gives me confidence to attempt do-it-yourself home improvement projects.

Nothing elaborate. Yet. But things that I have not done before: replacing light fixtures, patching drywall, adding tile to walls, replacing ugly rubber baseboard with much better looking wood baseboard.

Not long ago, I was painting (pre-existing) baseboard in my living room, and came to a spot where I had patched my carpet.

treat 2
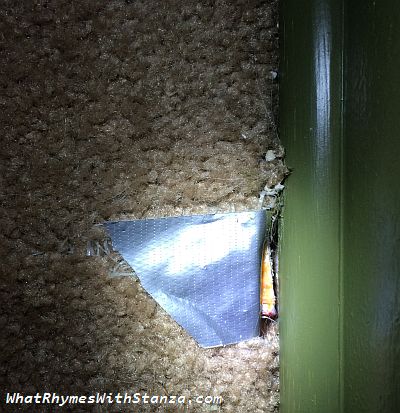
Yes, that is duct tape; the “patch” was mostly to keep the ripped seam from spreading while I decided what to do about it on a more permanent basis.

As I was pushing the carpet edge out of the way of the wet paint, I thought I saw…

…was it?

Did I just win the “old house lottery?” Was there really a hardwood floor beneath that natty carpet? Did the value of my home just increase significantly?

Was this a trick? Or a treat?

I was cautious at first, pulling up a small corner of the carpet.
treat 3
Yep, that was hardwood. Next question… what condition was it in, and how far did it extend? Given the nature of the previously discovered “repairs,” I could imagine all sorts of “tricks” that might be hidden beneath the underlayment.

So I pulled up a two foot by 10 foot strip of padding. This is what I saw:
treat 4
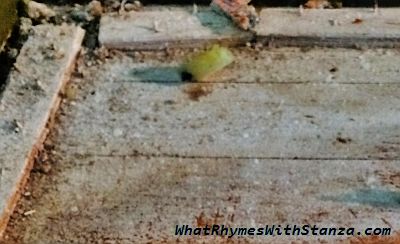
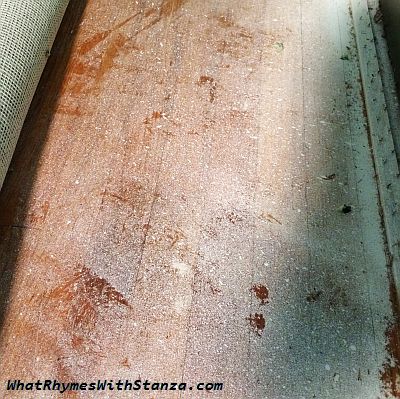
Yikes! I got a damp washcloth and wiped at the white stuff covering the floor. Now, this was promising!
treat 5

Ultimately I pulled up all the living room carpet, and now there’s no turning back.
treat 6
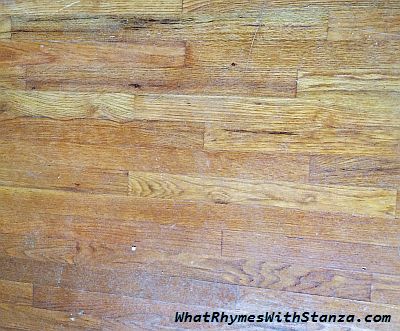
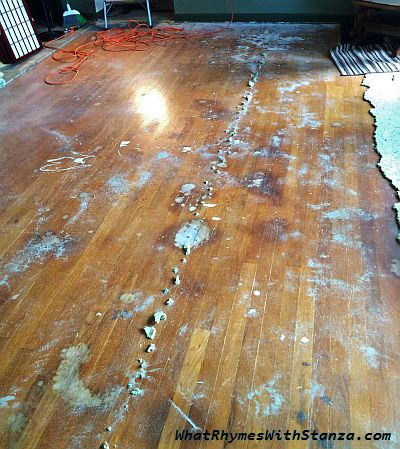
So I guess I’ll learn how to refinish a hardwood floor. I may find it easy; I may find it troublesome.

But just the doing of it… that’s the treat.

treat 7

Weekly Photo Challenge: Treat